Art Critique
Forum rules
This section is for any artist, writer, animator, or any form of creation to share their work in order to receive comment to improve themselves better.
Read the rules in detail here
Read the Critiquing suggestion here
Please open only one thread per person. Detail here.
This section is for any artist, writer, animator, or any form of creation to share their work in order to receive comment to improve themselves better.
Read the rules in detail here
Read the Critiquing suggestion here
Please open only one thread per person. Detail here.
5 posts
• Page 1 of 1
Art Critique
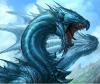
![]() by SomethingSquid » Fri Jan 11, 2019 5:49 pm
by SomethingSquid » Fri Jan 11, 2019 5:49 pm
I just barely started doing digital art, and I don’t really have any idea what I’m doing regarding things like shading and outlining. Does anyone have any resources on how to improve, or critiques for this art piece that I can incorporate into my next piece?
- Attachments
-
- SomethingSquid
- New to the forum
- Posts: 2
- Joined: Thu Jan 10, 2019 9:11 pm
Re: Art Critique
![]() by Dekkard2 » Fri Jan 11, 2019 6:08 pm
by Dekkard2 » Fri Jan 11, 2019 6:08 pm
That's pretty good. The best thing I can tell you is keep drawing, keep using references when you don't know how something is supposed to look.
I am open for commissions
https://aryion.com/g4/userpage.commissi ... d=Dekkard2
PM me if you're interested and we can work something out
https://aryion.com/g4/userpage.commissi ... d=Dekkard2
PM me if you're interested and we can work something out
-

Dekkard2 - ---
- Posts: 1058
- Joined: Tue Jun 19, 2018 7:48 pm
Re: Art Critique
![]() by hibbyjibby » Fri Jan 11, 2019 7:17 pm
by hibbyjibby » Fri Jan 11, 2019 7:17 pm
Definitely shows you're new to digital. But that's fine, we all start somewhere. Usually, bottom rung on the ladder. If you want resources, look online. Free information and guides everywhere. Brain/hand-eye exercises, websites for artists and info. Even Youtube has channels dedicated to this. If you want I can PM the ones me and my friends found work best.
As for the piece itself, not really gonna be as generous as some here will be. Remove the ponytail, looks like a guy's face. Definitely few if any feminine features on her. Teeth curve oddly, makes them seem at different heights. Eyes look a bit close, finger needs to be longer. I do like you atleast shaded parts here, but it's very strong. Bit obvious, messy.
Still, keep at it. Even if you do stuff I don't like, everyone should get a chance at improving their hobby skills. Also always be wary of comments that just praise you. Do more harm than good when you need actual input from people.
(●`ε´●) Only have one Waifu, because having more will ruin your life-u (。・`ω´・。)!!
-

hibbyjibby - Somewhat familiar
- Posts: 80
- Joined: Sat Nov 21, 2015 5:24 pm
- Location: The Southern Tip of America's D0ng0r
Re: Art Critique
![]() by merlovinit » Fri Jan 11, 2019 10:41 pm
by merlovinit » Fri Jan 11, 2019 10:41 pm
Digital art is not fundamentally different from traditional art. Any resources that are intended to help you learn how to draw will help you with this as well.
Pretty much every artist in the world who draws people could use more time doing figure studies. Sites like this are pretty helpful:
https://line-of-action.com/practice-too ... re-drawing
Pretty much every artist in the world who draws people could use more time doing figure studies. Sites like this are pretty helpful:
https://line-of-action.com/practice-too ... re-drawing
-

merlovinit - Participator
- Posts: 292
- Joined: Tue Oct 28, 2008 11:00 pm
Re: Art Critique
![]() by Nalzindar » Sat Jan 12, 2019 6:11 am
by Nalzindar » Sat Jan 12, 2019 6:11 am
If you are making digital drawings, some of the techniques you will use will depend on the drawing program you use, but as a general rule you can start with looking at youtube videos that explain how to best use it.
As for drawing digital, I will suggest you apply several "layers" (digital see-through paper sheets) when you draw that can be built on top of each other and i you know how to use the layers already you can do following steps.
You have a very good start already I see, but as a basic rule, use the rulers/curved-lines with care, nothing in nature is linear and you should probably use a "pen" to make it look less "perfect sometimes! I am also very knew on digital drawings and has done it for less than a year, but here are four basic tips for you that I have learned.
How to make a digital picture in four steps:
1) Make a simple draft with a blue (or red or green) pencil. Use a color because that helps you differentiate between the draft and the real black line
you will use (number two) for your "real" picture. Use a reference picture and learn how different body proportions and shadows looks like.
2) Create a new "layer/sheet". Your new layer work like a see-through paper that lies on top of your draft, but when you draw new lines now or use your
eraser, it won't affect the draft below. In that way you can always look at your draft while crating the nicer (black) lines for your image.
Use a Mapping pen or a G-pen while doing this, it will give you the best look (not a pencil or a painting brush).
( Tips: When your skills improve, you can in this step first make an own layer for your background and then create another layer for your main figures.)
3) Create another layer again for the colors. When you apply colors, you should make a new layer to each color you use, this will make erasing and
improvements far easier because if you "lock" the layers (the symbol for locking a layer can variate between the drawing-programs), you make sure
that whatever you do, only affect the one layer you are using and therefore won't affect or destroy the colors elsewhere if you are unlucky.
(Tips: In this step, use only the basic colors - no shadows, they comes later! Paint just with the basic colors belonging to each figure, for example you
can use fill and color every persons skin with a simple skin color and on another layer you color the grass with a simple green and on yet another layer
you color the sky blue.)
4) When your entire picture has the correct lines and all of its basic colors, you can start creating depths with shadows!
Go back to each color layer and use different shades of colors to give your picture a better look. For example, when you are painting skin, you use a
darker variation of your skin color to make shadows, the same goes for grass, sky and pretty much everything else.
(Tips: Use an oil-brush for this. It looks nice and will blends slightly with the color below (the basic color). For this process you can choose between
making a "hard" line where the line between the shadow and the basic color is sharp, or you can apply the blender (an app that blends two colors
together and make a smooth gradient between them)
When doing this, use at least three different shades to make the colors looks more professional. The more color variation, the more natural it will
look and you can often use completely different colors to do it. For example you can use yellow/mustard on your green grass and then the blender on
top o that again, not everything in nature is green you know!)
This became longer than I thought and there is a thousand things more, but I hope at least some of this will help you
P.S. When it comes to colors, here you can see two examples of mine:
I applied two colors on some the figures/objects here: https://aryion.com/g4/view/500777
And three colors here, you can see the difference: https://aryion.com/g4/view/502901
-
Nalzindar - Somewhat familiar
- Posts: 72
- Joined: Sat Nov 26, 2016 6:40 pm
5 posts
• Page 1 of 1